RAPS document uploads
Changelog
- 2019-06-06
- The upload function will try to match the patient member_key (in format 000W00000)
- If the upload failed, user will be shown an input box to rename the file and retry the uploads
- Default Provider & Facility removed from upload screen, the application will pick up those information from the member’s data
- Document splitting function
Filename matching algorithm
The application try to match Member ID, in the following format 0000A00000, in which 0 denotes a number, while A is a character.
Open application and select dataset
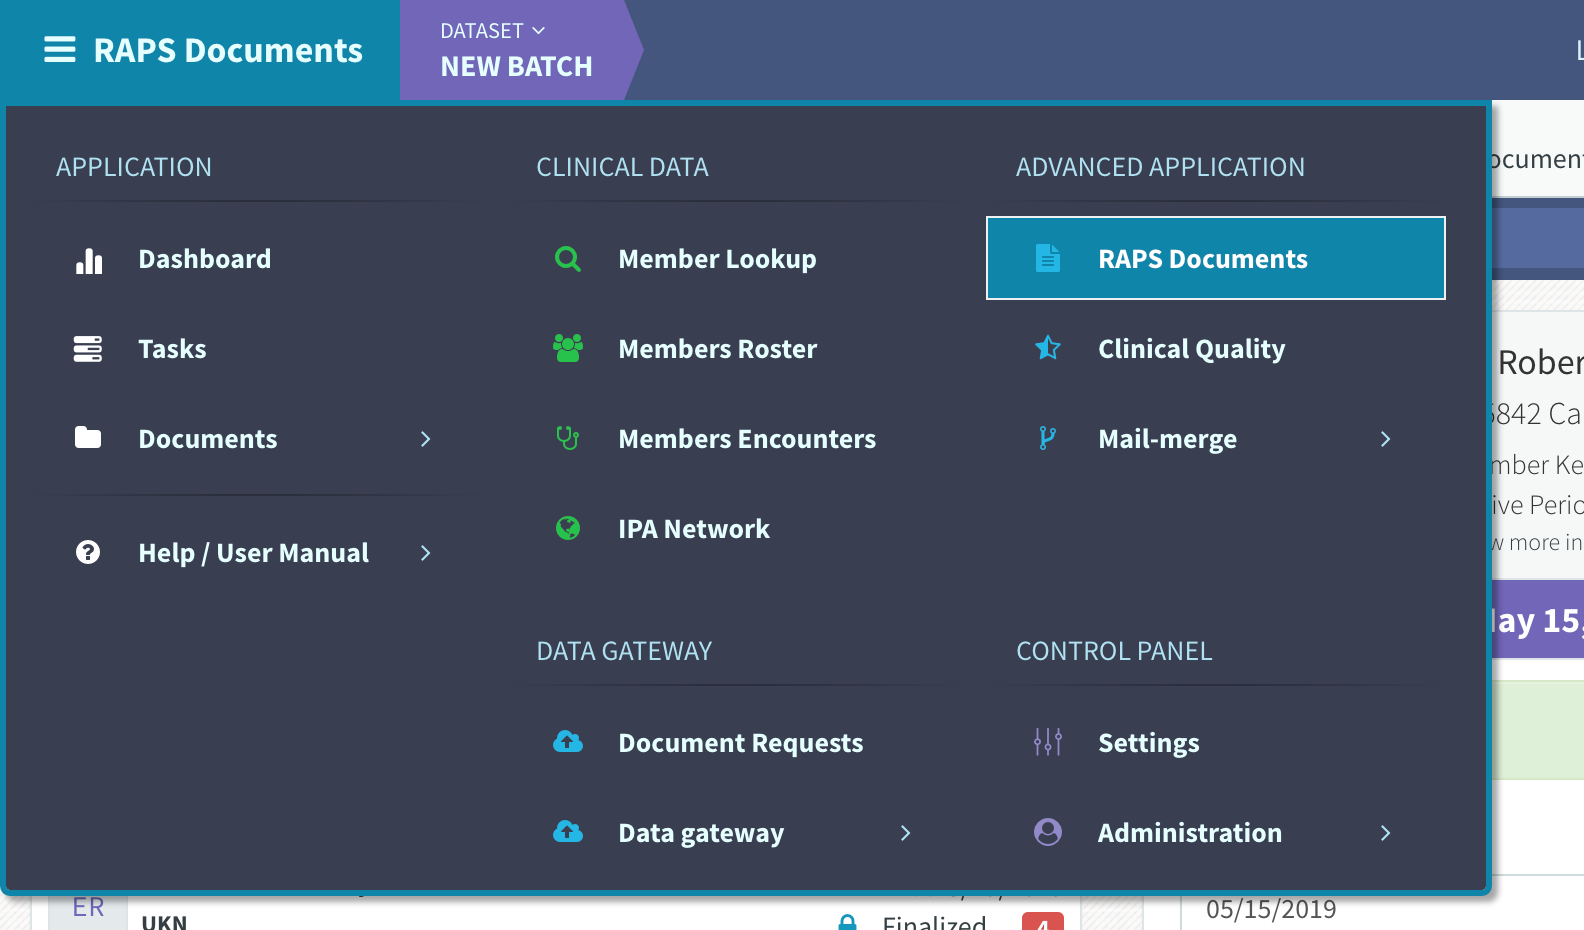
STEP 1: Open application
- Click primary navigation menu and select RAPS Documents under Advanced Applications section
STEP 2: Select a dataset
- Select one of the available dataset to start coding
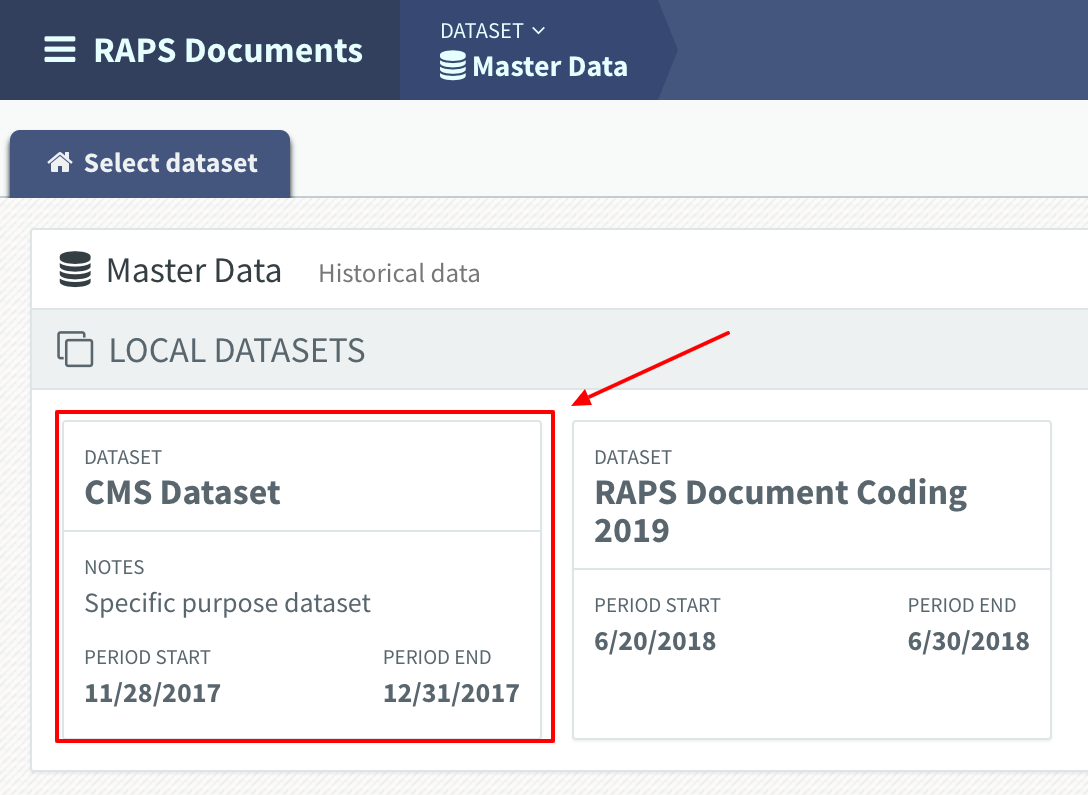
- To go back to the dataset selection screen, click Select Dataset

Export Data
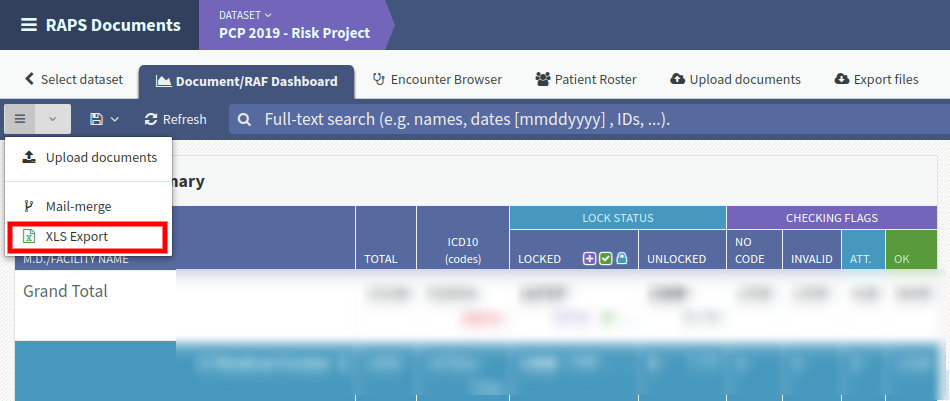
STEP 1: Start the export proces
- Click application menu and select XLS Export in Document/RAF Dashboard section
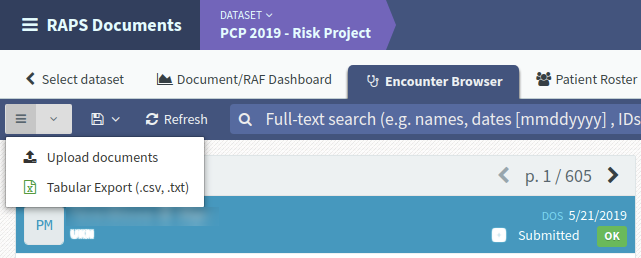
- Click application menu and select Tabular Export in Encounter Browser section (this also works under Dashboard drildown screens)
STEP 2: Select export options
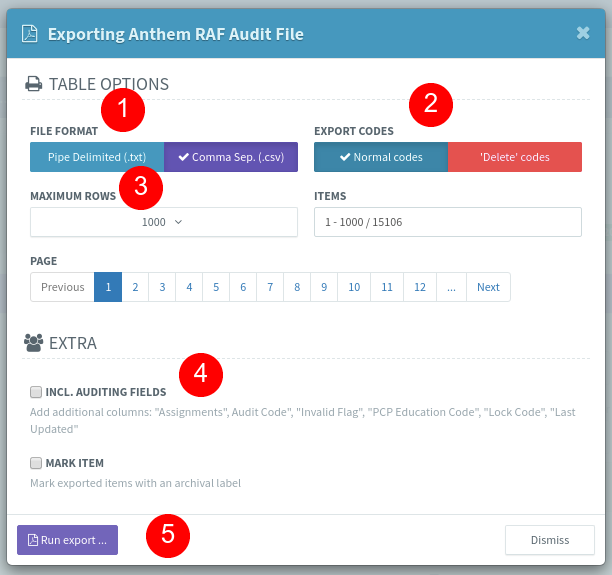
- [1] Select the file format
- [2] Select the types of code to include in export file
- [3] Select the maximum numbers of encounters to include in the export files
- [4] Include auditing fields
- [5] Start the export process
STEP 3: Export files management
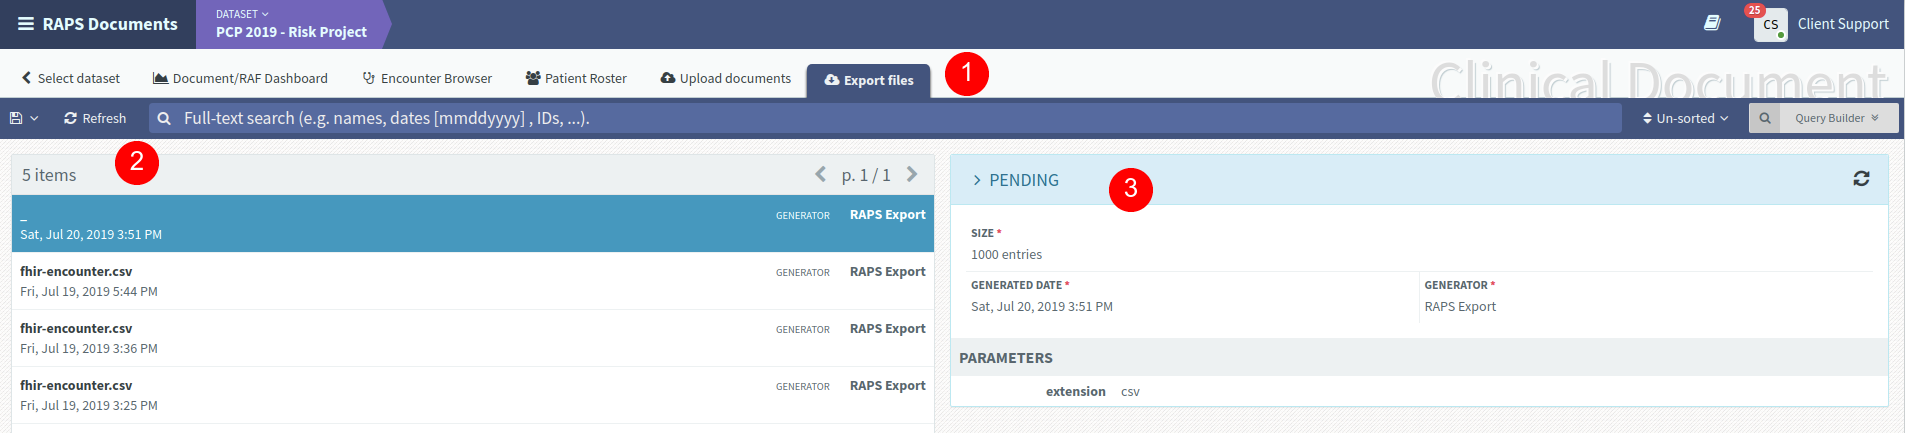
- [1] Upon the export successfully started, the app will redirect to the export screen
- [2] List of prior generated export files
- [3] Current status of the export files
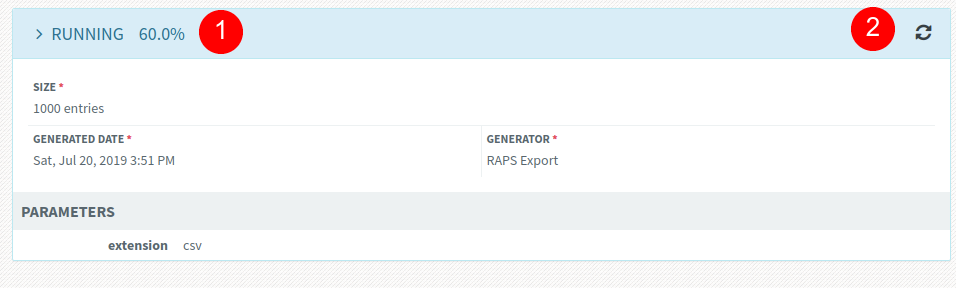
- [1] Current progress
- [2] Click refresh button to update progress
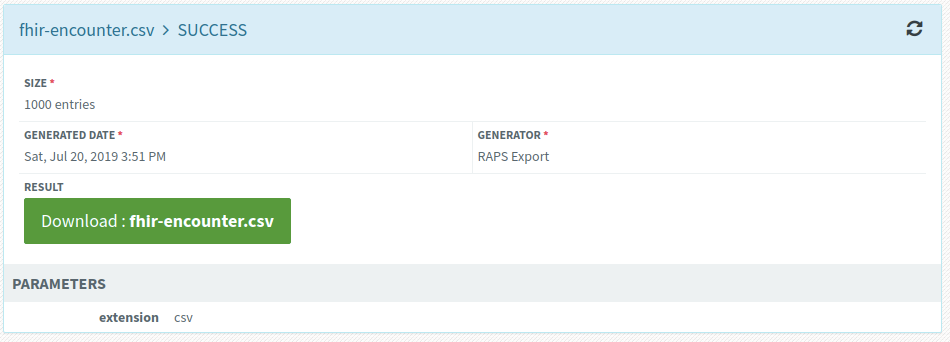
STEP 4: Download succesful exported files
Upload documents
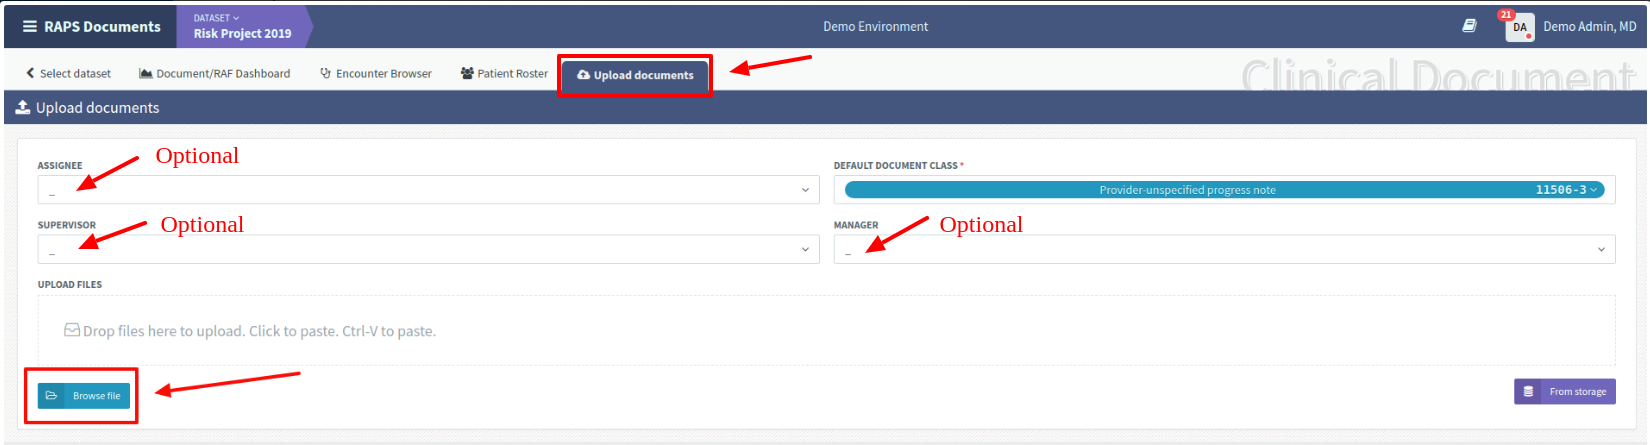
- STEP 1: Start Upload document process
Click on Upload document to go to the ‘Upload document` page
When user want to create a new encounter
- User can choose Assignee, Supervisor and Manager if they want
- User can drag and drop files on to the upload box or browse for files to upload.
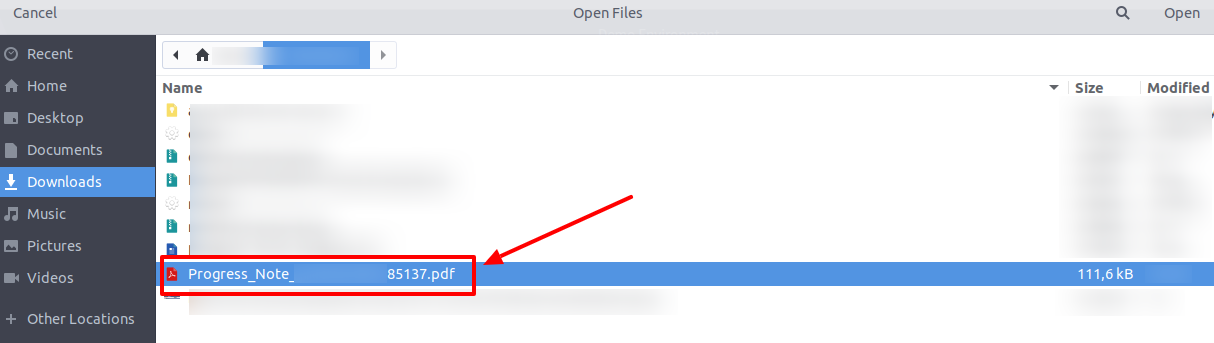
STEP 2: Requirement for file upload
- Uploaded files have filename include patient’s member ID
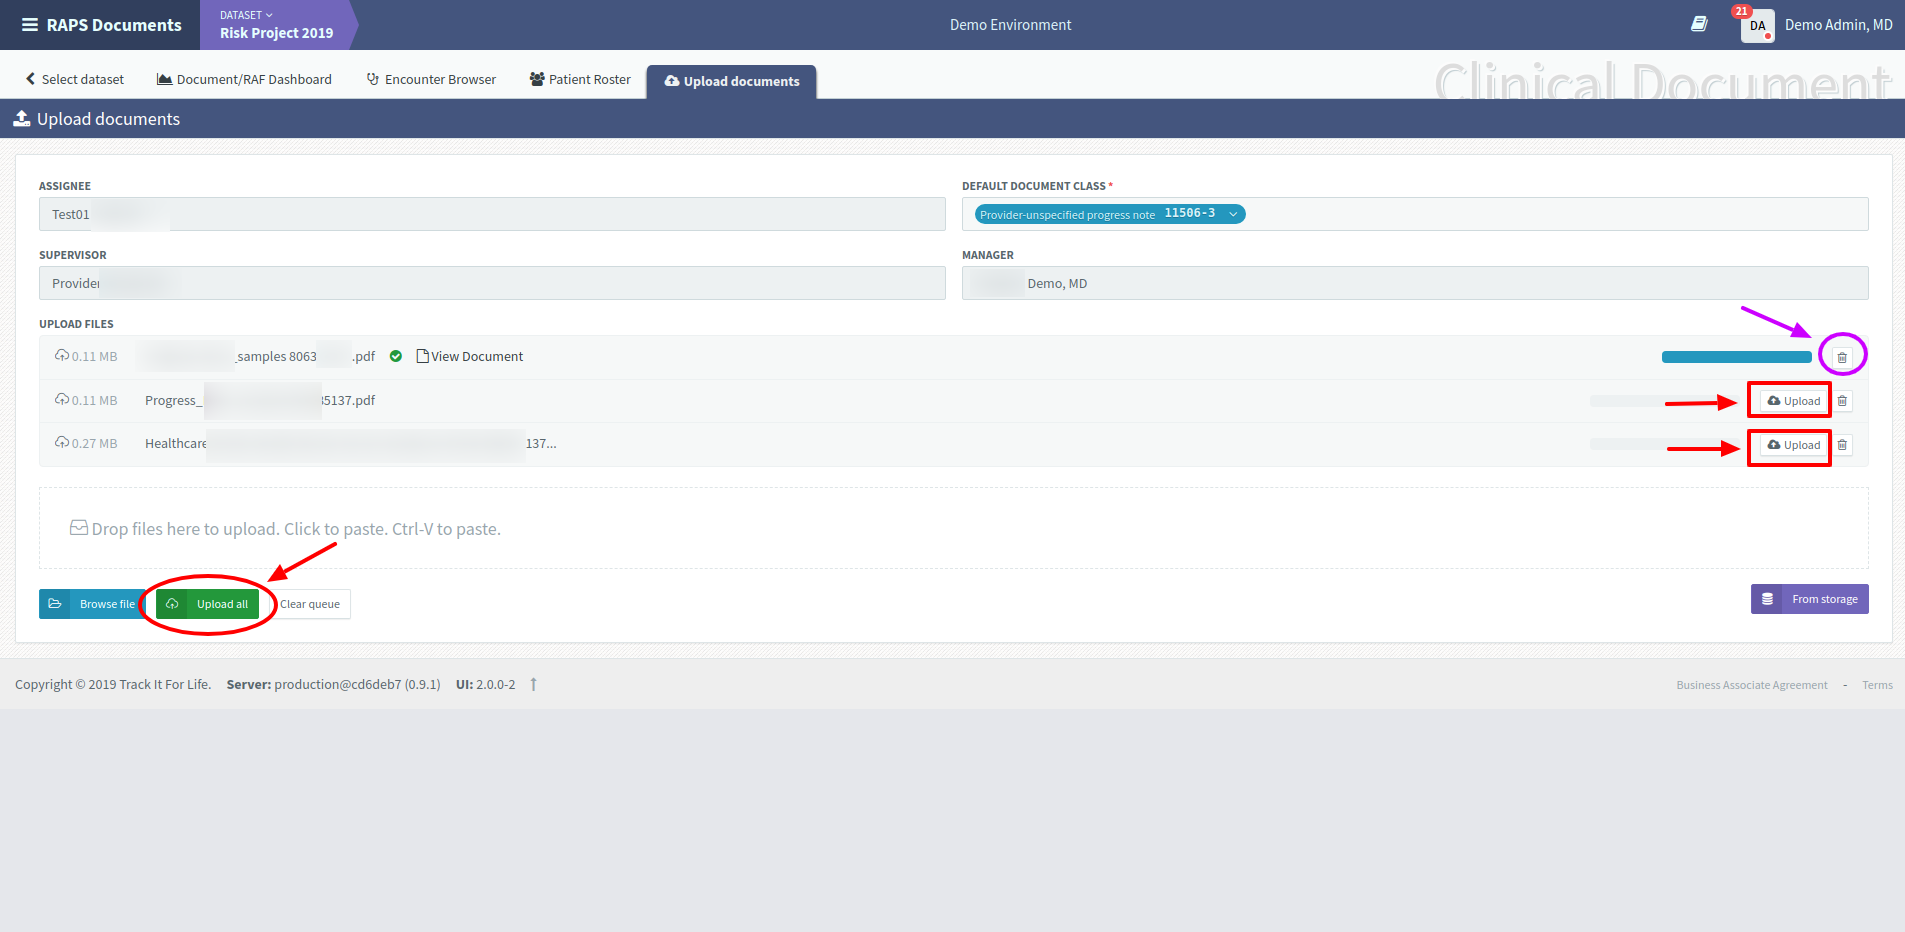
STEP 3: Method upload file
After drag and drop file .
- User can select Upload all if you want to upload all file.
- User can select Upload if you want to upload separately from the file
- NOTES
- When the user does not want to continue uplpoad, it is possible to select Clear queue to clear all
- when the user want to delete file uploaded, it is possible to select button delete
[Under Construction]Duplicated files will be rejected.
Encounter browser
Click on Encounter browser to go to the ‘Encounter browser` page
The encounter browser is the main navigation and coding tool. It allows us to quickly preview the encounter and a full-screen coding view.
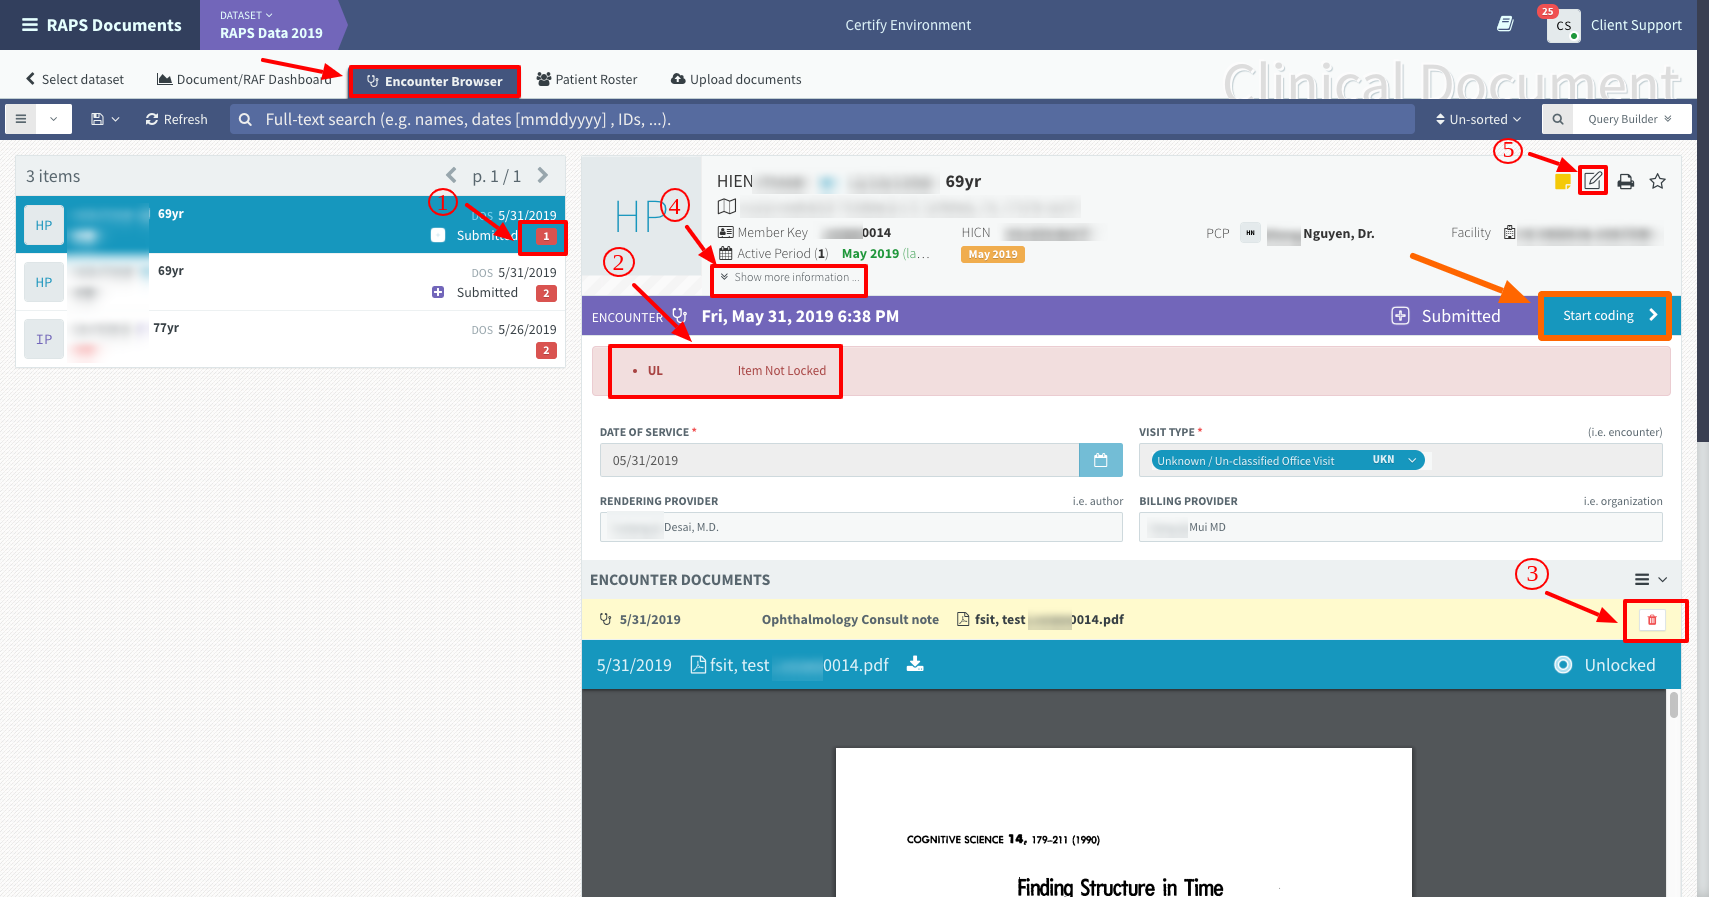
- Annotate data of form above:
- [1] The total number of invalid errors of each encounter
- [2] Specify the name of the encountered error
- [3] Button delete document if user want to delete document
- [4] Show more information
- [5] Show form fill in more information about your Members alias and Biography notes

- Select Start coding when the user wants to see details to edit incorrect information.
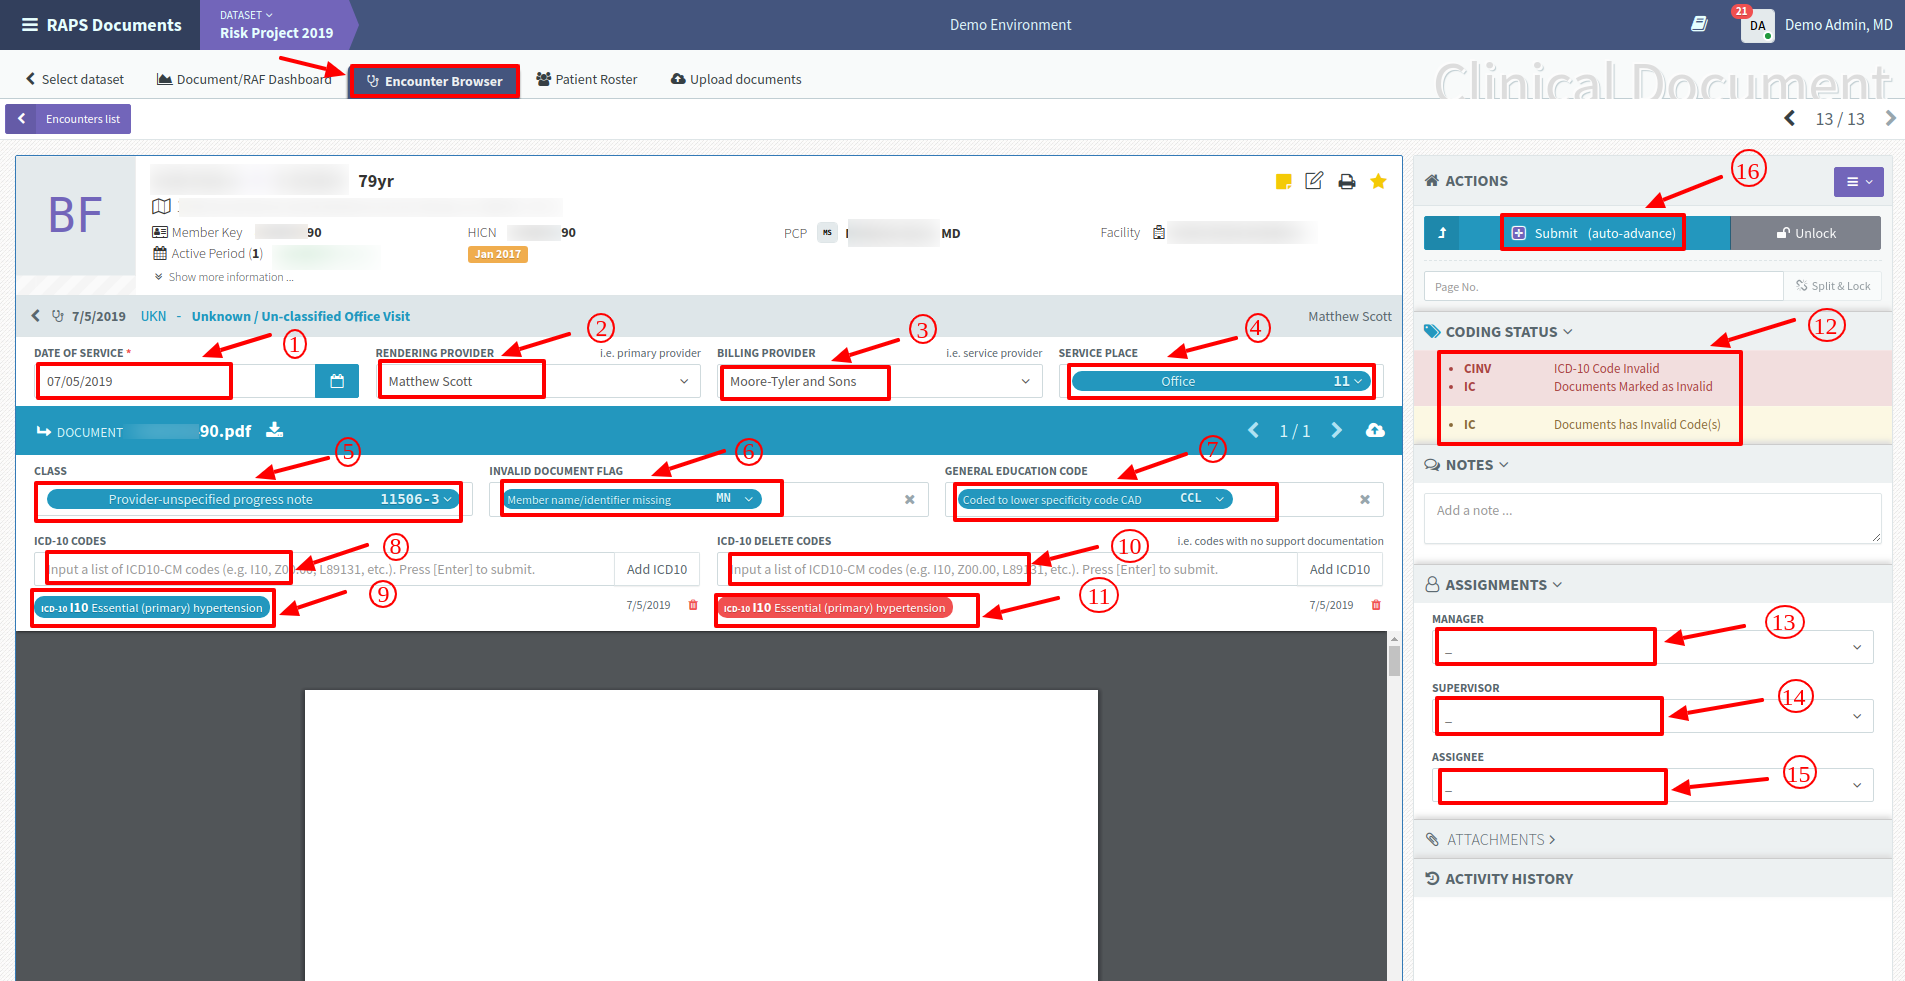
Annotate the data of form above:
- [1] The user can change the date of service within the allowed date of the dataset if the user has the desired.
- [2] [3] The user can choose to change the Rendering provider or Billing provider if the user wishes.
- [4] Select the service place that the user wants
- [5] Select the class that suits the user
- [6] [7] Select Invalid doucment flag , General education code if the user want . Optional
- [8] Add ICD-10 code
- [9] List of ICD-10 codes has been added
- [10] Add ICD-10 delete codes
- [11] List of ICD-10 delete codes has been added
- [12] List status code
- [13] [14] [15] The user can choose Manager, Supervisor, Assignee in the case when uploading documents you do not choose
- [16] Select Submit to update status encounter
Dashboard and drill-downs
Upon select a dataset to workon, you will be presented with the Summary Dashboard.
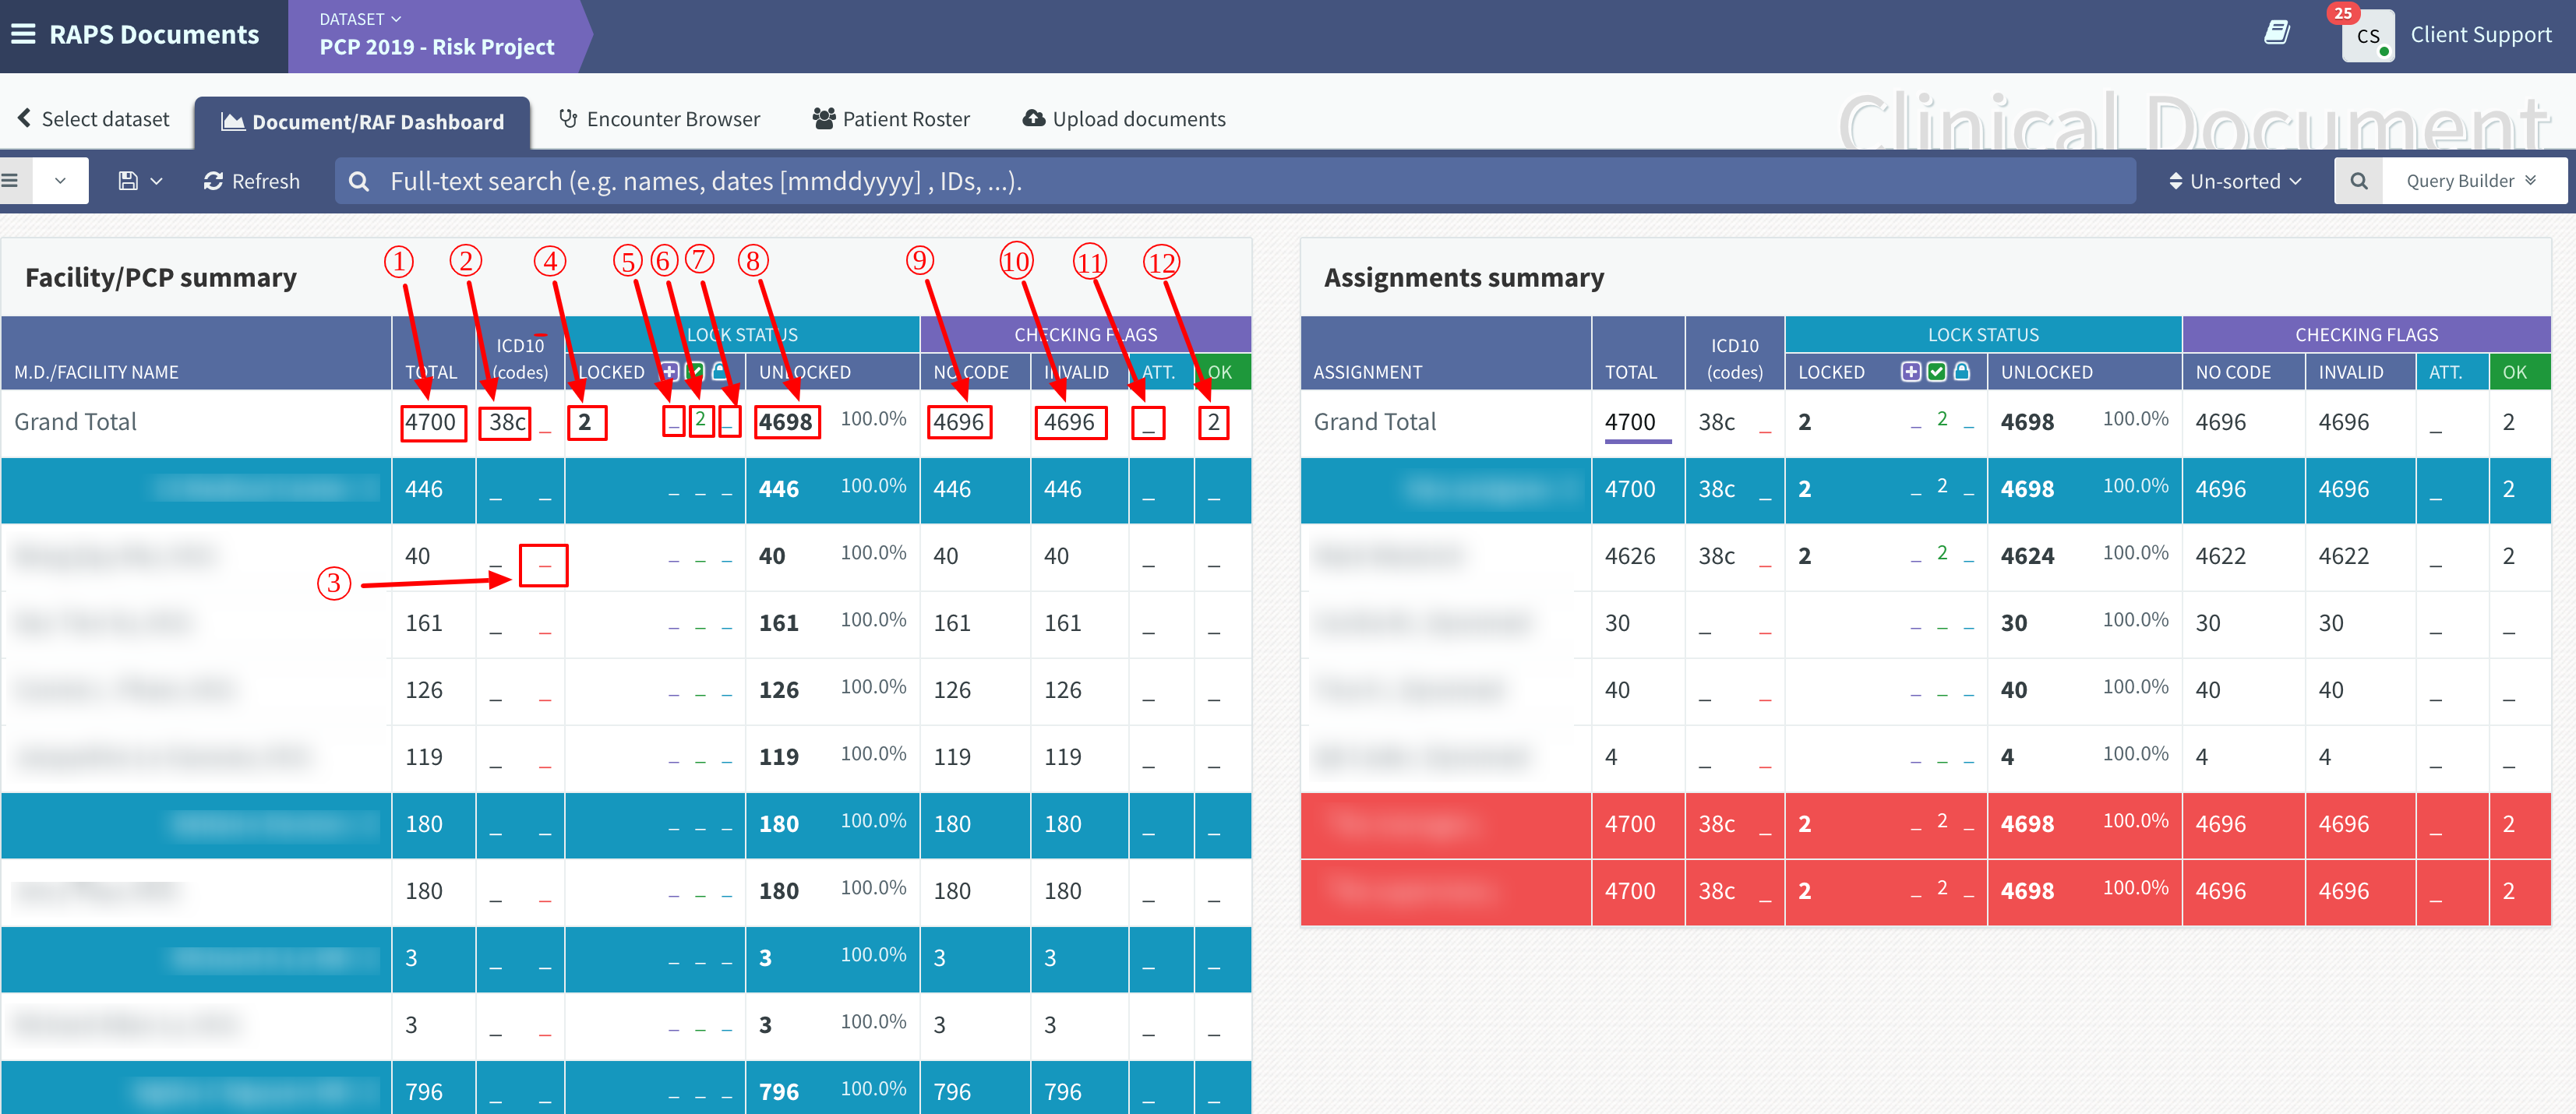
- The Summary Dashboard show statistics of:
- Facility / rendering providers
- Each user’s assignments
- Annotate the data of dashboard:
- [1] Total encounter
- [2] Add codes ICD10
- [3] Codes ICD10 deleted
LOCK STATUS
- [4] Total locked encounters
- [5] Encounter locked as submitted
- [6] Encounter locked as reviewed
- [7] Encounter locked as final (no further modification)
- [8] Total un-locked encounters
CHECKING FLAGS
- [9] No code = No ICD 10 codes added (both nomal/delete)
- [10] Invalid = All invalid except need attestation
- [11] ATT = Attestation required before qualified
- [12] OK = All locked and fully valid items
You can click each number in the Summary Dashboard to view the specific details of the encounters.
The drill down show a list of encounters
Re-assign locked notes
In case the user want to re-assign locked note.
STEP 1: Drill-down to
submittednotes- Click
[5] Encounter locked as submittedat Dashboard
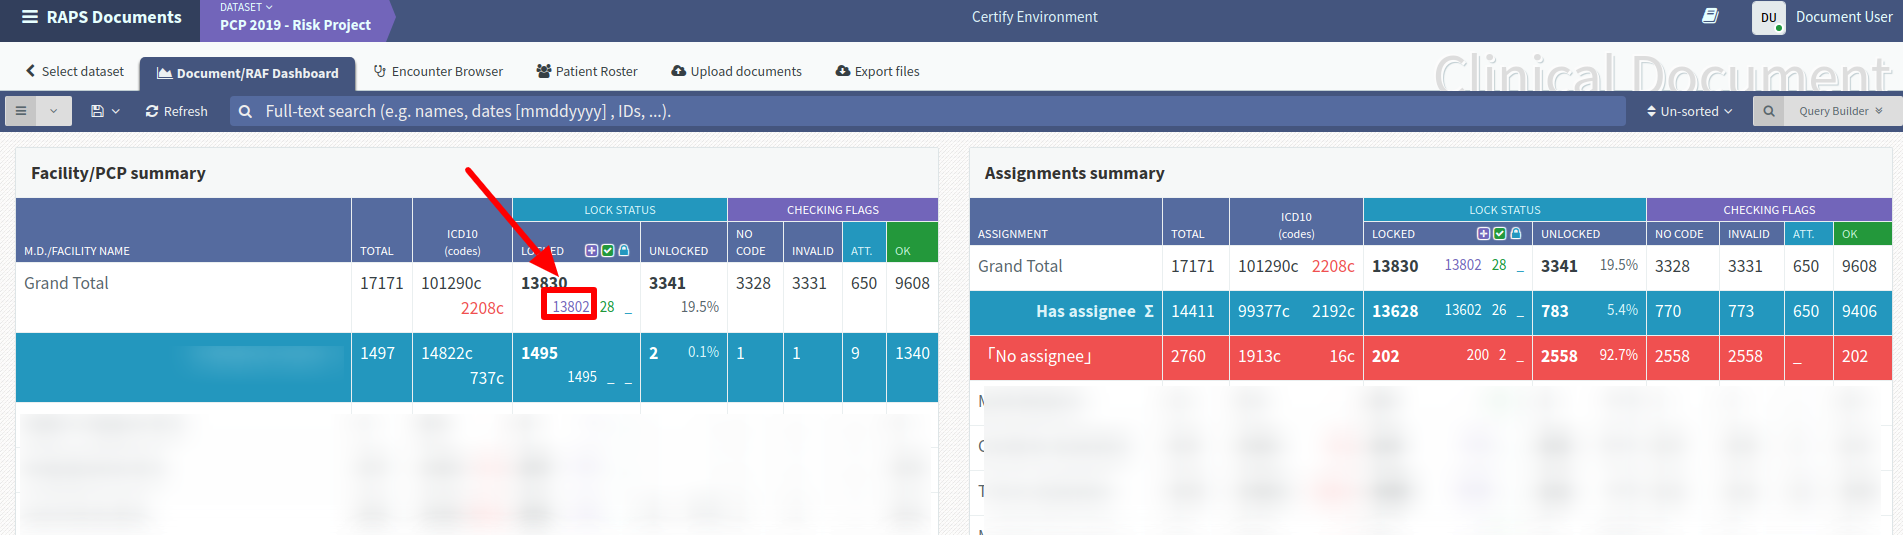
- Click
STEP 2: Search for encounter that do not have a suppervisor
- Click “Query Builder” to go to the dropdown menu page.
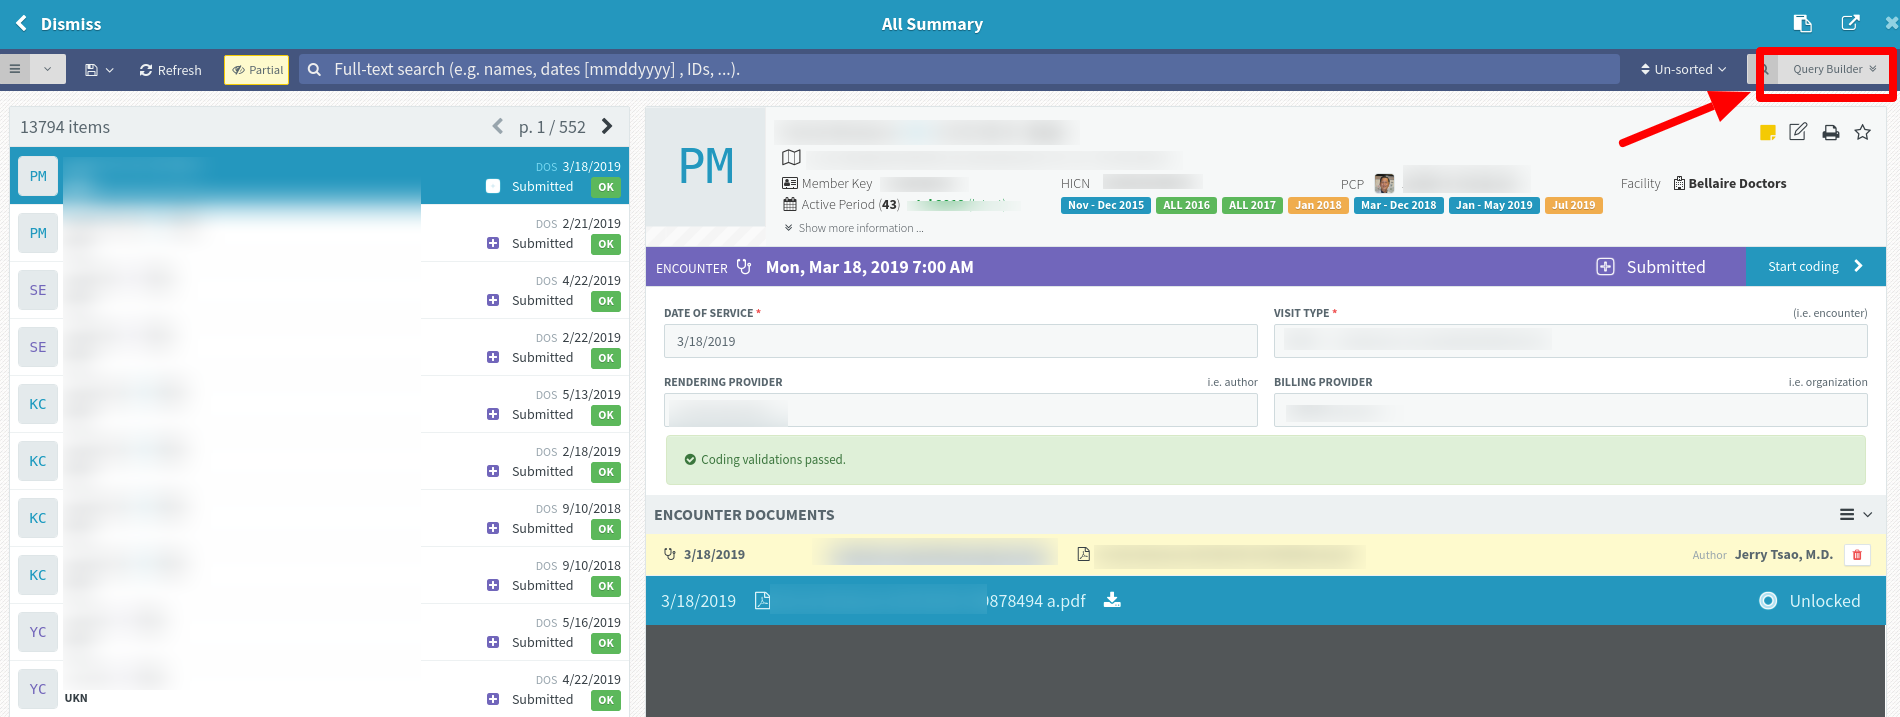
- Here, users can search for specific encounters.
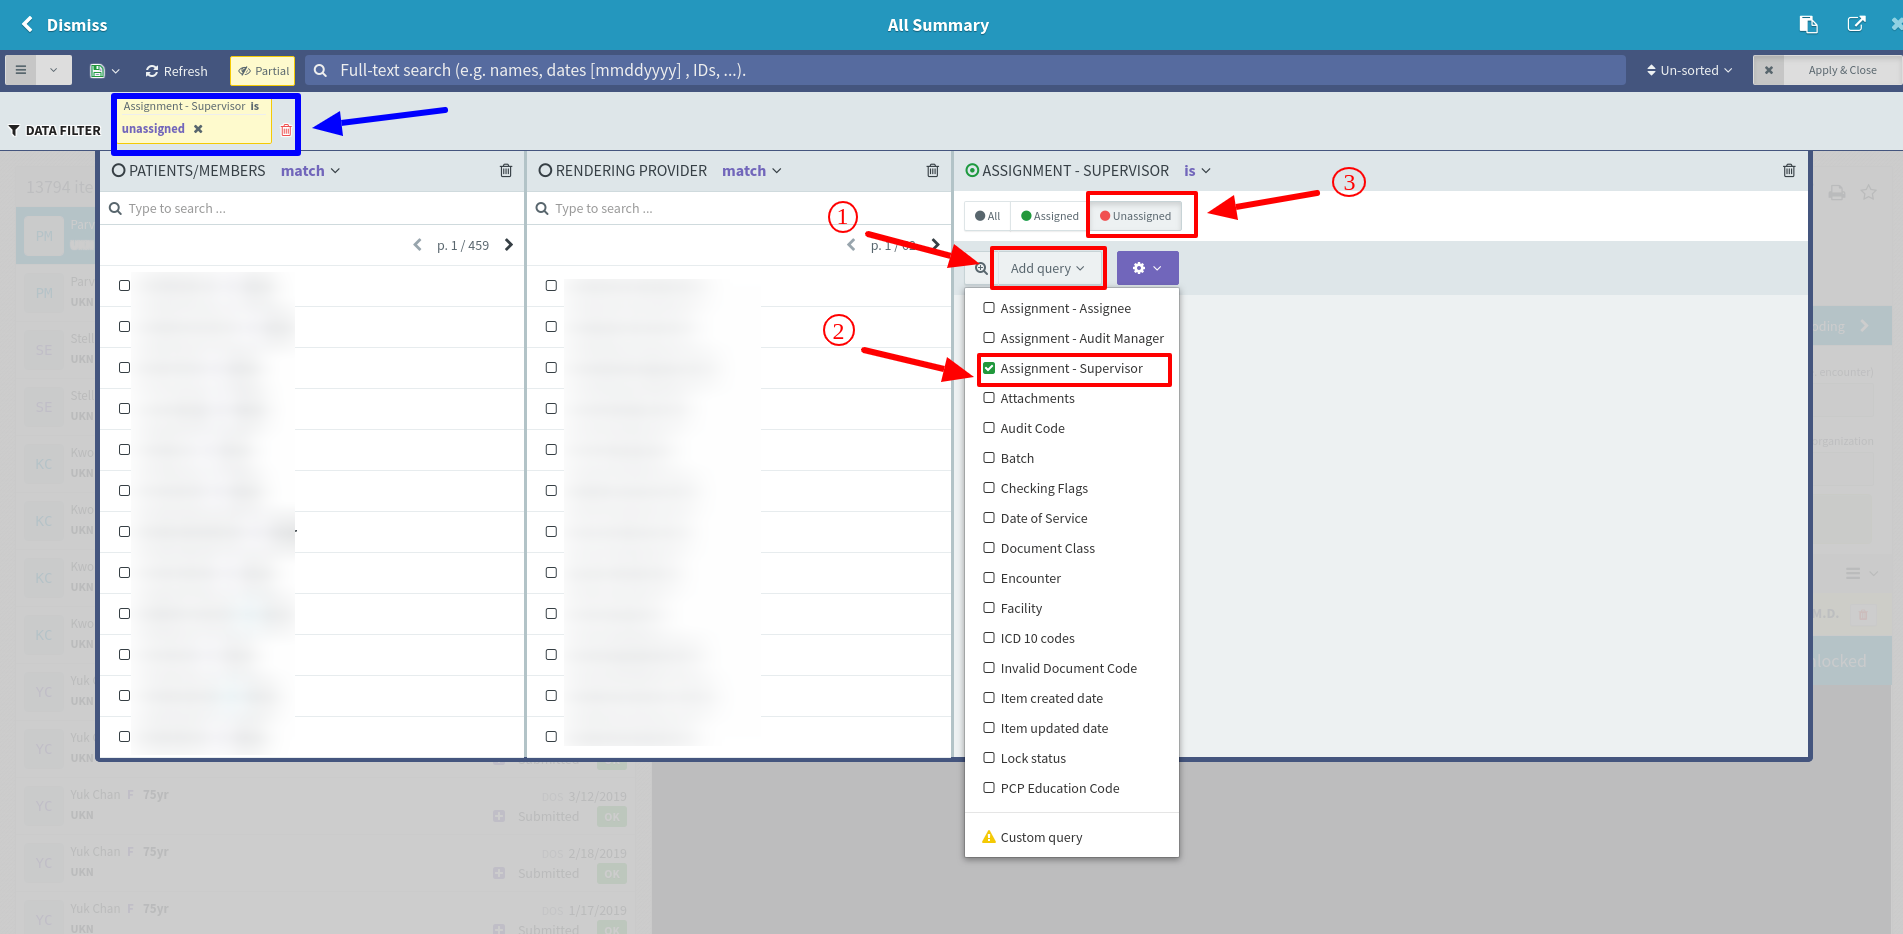
- [2.1] Click Add query to activate the drop-down list.
- [2.2] Select a query
- [2.3] After selecting the query, enter the query value. In this case, select the assignment value.
NoteThe active query will be displayed at the upper left corner.
STEP 3: Re-assign lock notes
- The listing shows items that matched the query.
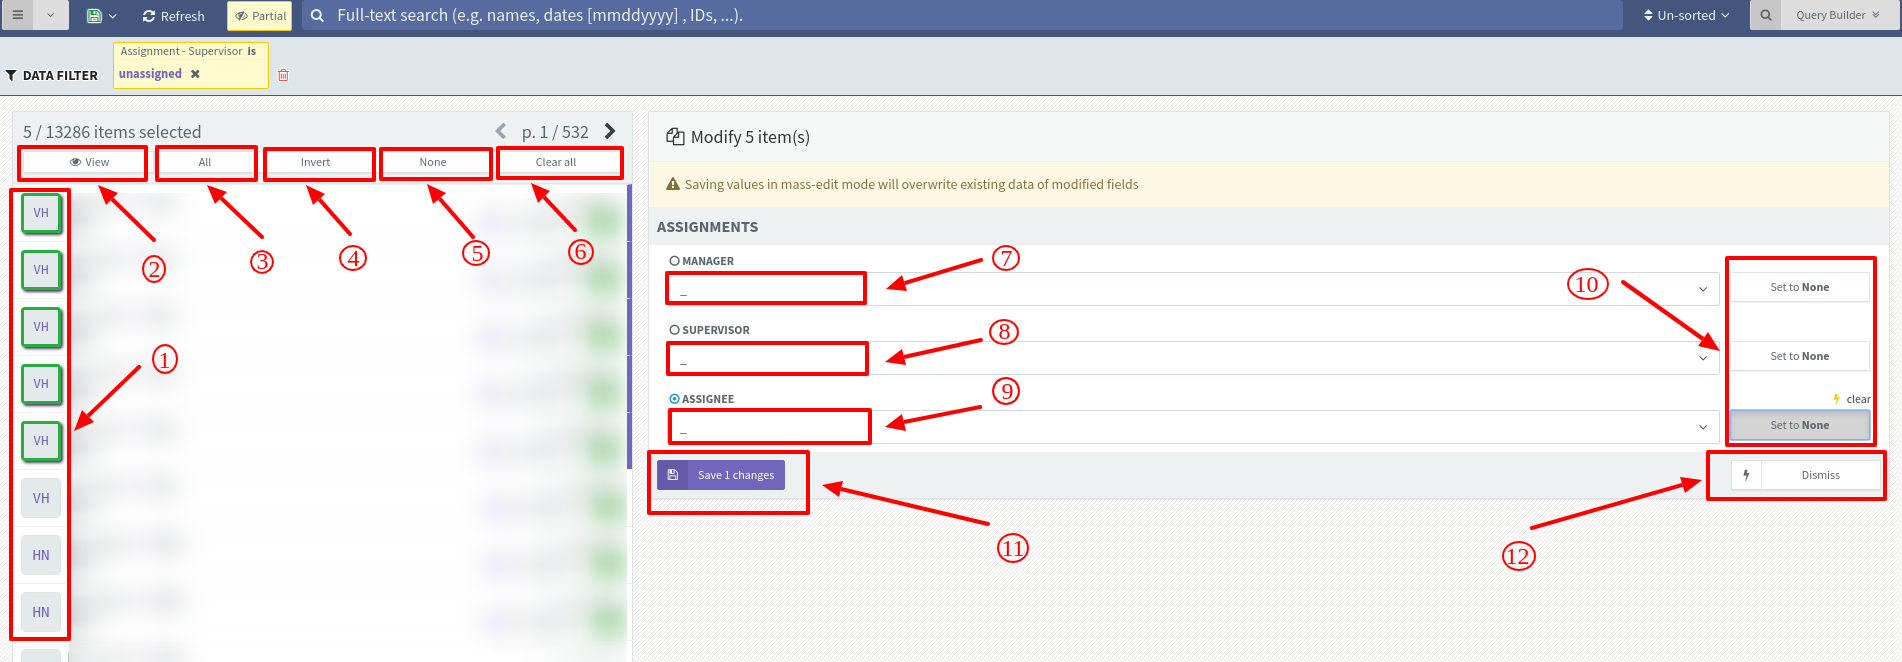
- [3.1] Click on the avatar to start selection mode.
Choose 1 in the tools from 3.2 to 3.6 to select items
- [3.2] Display detail information of encounter has been selected
- [3.3] Select all encounter in 1 page
- [3.4] Reverse the previous state
- [3.5] Clear the status of encounter in 1 page
- [3.6] Clear the status of encounter in all pages
Then the user can choose to re-assign the locked notes as desired
- [3.7] Choose new manager
- [3.8] Chooser new supervisor
- [3.9] Choose new assignee
- [3.10] Click button Set to none to remove
Then save or cancel the work
- [3.11] Save those items changed
- [3.12] Dismiss
Patient encounter roster
Click on Patient roster to go to the ‘Patient [encounter] roster` page
Each dataset will be populated with a specific set of patients (i.e. pull-list)
Upon selecting a patient, the application show the list of encounters uploaded for that patient.
![Figure 5.1: Patient [encounter] roster](../../../_images/5.11.png)
- Annotate the data of form above:
- [1] Select multiple patients at the same time
- [2] Perform tasks for selected patients.
- [3] Patient inactive status
- [4] Patient active status
Users can add an encounters if they want by selecting add encounter. Then fill in the details in the form as shown below
![Figure 5.2: Patient [encounter] roster](../../../_images/5.21.png)